How to make a layered SVG from a photo for Cricut
To make a layered SVG from a photo for Cricut, turn the photo into a few flat colours, with one layer for each colour. With PULPO!, upload the photo, pick a photo-colour look with 2 to 4 colours, and download the layered SVG. In Cricut Design Space, upload the SVG, cut each colour on its own mat (mirrored for iron-on), weed, and press the layers in order.
What a layered SVG is
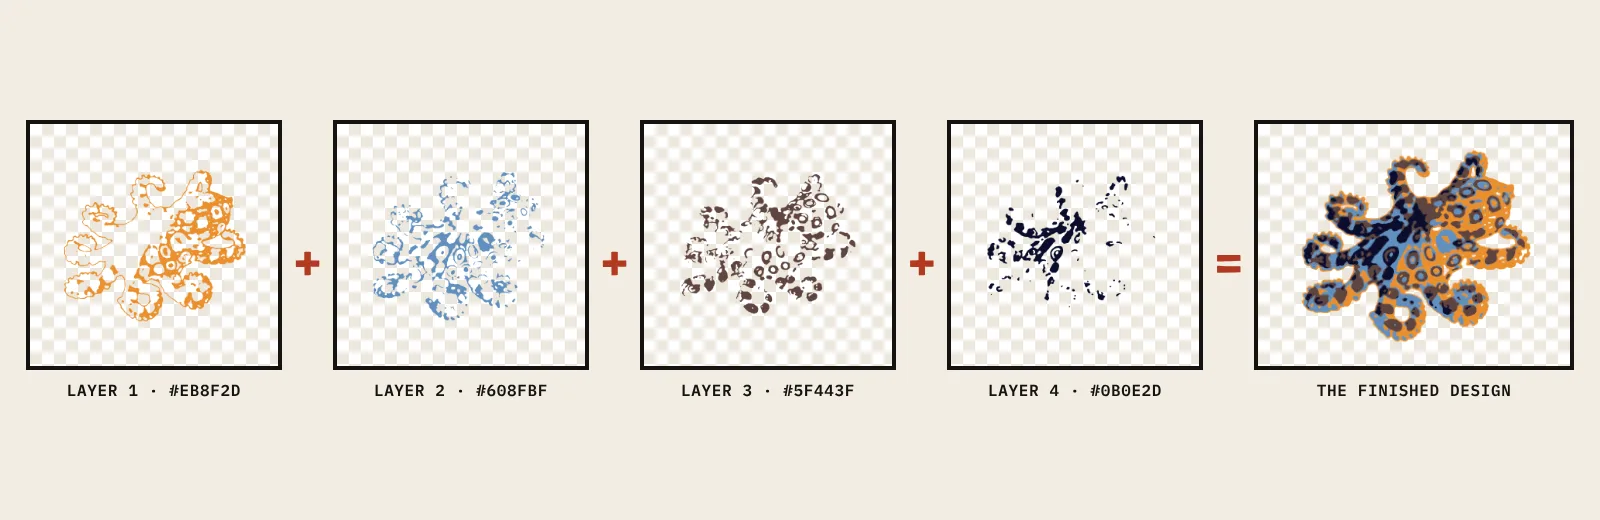
An SVG is a vector file: it describes shapes, not pixels, so it stays sharp at any size. A layered SVG has one group of shapes for each colour. Design Space reads each group as a layer, and each layer cuts from its own sheet of vinyl.
Make the SVG from your photo
- Choose the photo. One clear subject in strong light works best. A pet, a face or a building is ideal.
- Open the PULPO! tool and upload the photo. Crop it, and remove the background if you want only the subject.
- Pick a photo-colour look: "Full colour" or "Colour with white gaps". These looks give each colour its own area, so the vinyl layers sit next to each other. The light-and-dark looks (for example "Two colours") stack each layer on the one before.
- Open "Your blocks". Each block is one layer. Tap a colour to move it to another layer: put all the background shades on one layer, and keep a small bright detail on its own.
- Change the ink colours to match your vinyl, if you want. The SVG uses these colours, which helps you see each layer in Design Space.
- Get the Maker pack in step 3. Open the cricut-vinyl folder: it has the layered SVG and one SVG for each colour.
Cut it on a Cricut
- In Design Space, start a new project and click Upload.
- Choose the layered SVG from the cricut-vinyl folder, then Save. Select it in your uploads and add it to the canvas.
- Check the Layers panel: you see one layer per colour. If the image is grouped, select it and click Ungroup.
- Resize the whole design while all the layers are selected, so they stay lined up.
- Click Make. Design Space puts each colour on its own mat.
- For iron-on, turn on Mirror for every mat. For adhesive vinyl, leave Mirror off.
- Choose your material, load each sheet shiny side down (iron-on), and cut each mat.
- Weed each layer: remove the vinyl that is not part of the design. Small specks are hard to weed, so keep "Remove specks" up in the tool before you download.
Press layered iron-on
These steps follow Cricut's own layering guidance. Use the Cricut Heat Guide for the time and temperature of your vinyl and your garment.
- Press the bottom layer first. With a PULPO! design, start with layer 1 (the lightest colour).
- Press each lower layer for only 5 seconds, then peel the carrier sheet when it is warm, not hot.
- Put a heat-resistant cover sheet over the whole design before each press, so no vinyl touches the heat plate.
- Press the top layer last, for the full time from the Heat Guide.
- Keep to 4 layers of iron-on or fewer in a stack. Glitter, holographic and foil iron-on go on top only.
With a photo-colour look, the colours sit next to each other and do not stack, so a 5-colour design is still only 1 layer thick in each place.
Silhouette users
The desktop Silhouette Studio needs Designer Edition or higher to open SVG files. The Silhouette Go mobile app opens SVG files for Bluetooth Silhouette machines. In Silhouette Studio, ungroup the design, then send each colour to its own cut.
Common mistakes
| Mistake | What happens | Fix |
|---|---|---|
| Mirror off for iron-on | The design is the wrong way round on the shirt | Turn on Mirror for every iron-on mat |
| Resizing one layer only | The colours no longer line up | Select all the layers before you resize |
| Too many colours | Hours of weeding and many small pieces | Use 2 to 4 colours; merge shades in "Your blocks" |
| Full press on every layer | The lower layers shrink or shift | 5 seconds for lower layers, full time for the top layer only |
| Busy photo background | Lots of tiny shapes to cut and weed | Remove the background in step 1 of the tool |
Make your layered SVG
Upload a photo, check your layers, and get the Cricut files for £4. Designing is free.
Start with a photoSources
- Cricut Autopress layering technique (Cricut Help): layer order, short presses, 4-layer limit, mirroring
- How to upload an SVG to Design Space (Paperflo Designs)
- How to import SVGs into Silhouette (Silhouette School)
Questions
Do I need to mirror a layered SVG for iron-on?
Yes. For iron-on (heat transfer vinyl), turn on Mirror for each mat in Design Space before you cut. For adhesive vinyl, do not mirror.
How many layers of iron-on can I stack?
Cricut recommends no more than 4 layers of iron-on in a stack. Glitter, holographic and foil iron-on go on top only.
Why does my SVG upload as one grouped image?
Some SVG files upload as a group. Select the image and click Ungroup to move or resize each colour on its own. The PULPO! layered SVG has one group per colour.
Which PULPO! look is best for vinyl?
A photo-colour look. Each colour fills its own area, so the layers sit next to each other and do not stack. The light-and-dark looks stack each layer on the one before.
Can I use the free PNG files on a Cricut?
You can upload a PNG to Design Space and remove the background, but you get one colour at a time and rougher edges. The layered SVG in the Maker pack is cleaner and keeps the colours apart.