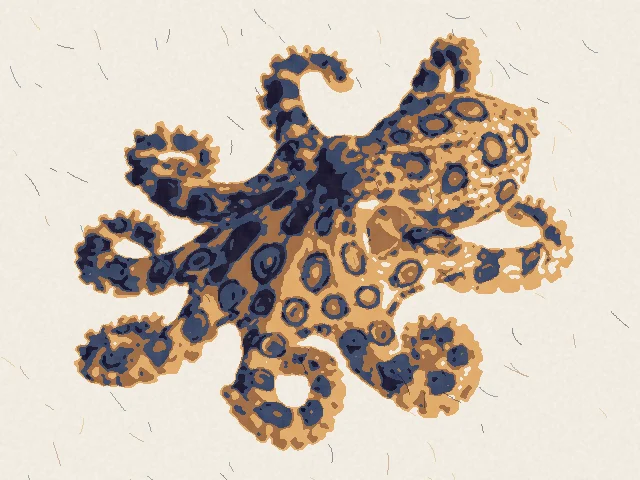
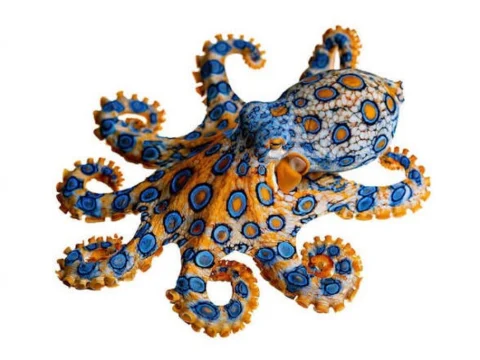
Upload any photo and PULPO! splits it into lino blocks, one for each colour, ready to trace and carve. Get plates to carve, layered SVG files for Cricut and laser, or your design printed on an art print, a tee, a hoodie, a tote, a mug or cards.
Your photoA pet, a place, a face. Crop it, remove the background and set the light, so the photo is right.
LayersOne tap for bold black, two or three colours, a line drawing and more. Then adjust the inks and detail, or touch up each layer by hand.
Carve or buyDownload free plates for each layer and cut your own blocks. Or we print it for you: an art print, a framed print, a tee, a sweatshirt, a hoodie, a tote, a mug or cards.
Six looks, one photo
Tap a look to start with it
What you can get
From the same photo
Free files£0
A plate for each layer, flipped and ready to carve, with registration marks and a picture of the finished print. PNG files. No sign-up, no email.
Yes. The design tool is free with no sign-up. Download the files with no sign-up. You pay only if you order something printed.
Do I need to know how to carve?
No. Start with the Bold black look: it makes one simple layer. Each plate shows black where the lino stays and white where you cut away.
Who owns my design?
You do. Use only photos that you took or have the right to use. We use your design only to make and send your order.
How much is delivery?
UK delivery is £4.95 for the whole order, or £6.95 if the order has a framed print. US delivery is $5.95 for the whole order: we send tees, hoodies and totes to the US, priced in dollars.
How long does it take?
We print each order for you and send it. UK orders usually arrive in 5–10 working days. We email you when your order is on its way.
Can I return my order?
Products with your own design are made only for you, so we replace or refund them if they arrive faulty or damaged. You can return designs from the PULPO! Shop within 14 days. See the returns policy.
What is the print quality like?
Art prints are on thick matte art paper with a white border, like a real lino print. Tees, totes, sweatshirts and hoodies are cotton, and mugs are dishwasher-safe ceramic. If your photo is too small for the size that you pick, the site tells you before you order.
Do you send newsletters?
Only if you tick the box. We send new styles, challenges and offers about every two weeks. Every email has an unsubscribe link.
Make a print
Three steps: your photo, the layers, then carve or buy. How it works →
Paint on
1×
Colour stays on the blockGrey is cut awayShown flipped
Proof
1Get your photo right
Use a clear photo with one main subject. A plain background gives the cleanest print. Change the photo here, before it becomes layers.
Showing the sample image.
These change the photo. The layers come from it in the next step.
Drag on the image to draw the crop.
2Make your layers
Pick a look
Your blocks
Tap the photo to pick a colourSample
A bigger sample takes the average of the pixels around the place you tap. Use it on grainy photos.
Move this colour to…
The colour of each block, and how much of the picture it covers. Block 1 prints first.
We deliver to the UK and the US only at the moment. The design tool and the carving files are free in every country.
Wear your print
£25
UK delivery £4.95 (£6.95 with a framed print). Printed for you and delivered in 5–10 working days.
Tempo
Colour
White. More colours soon.
Print size
Size and place
Drag the design on the picture to move it. Pinch, or use the slider, to change its size.
Lightest layer
Leave out layer 1 for a cut-out look, with no box around your design.
Size
Size guide
Bella+Canvas 3001, measured flat
Size
Chest width
Length
S
46 cm
71 cm
M
51 cm
74 cm
L
56 cm
76 cm
XL
61 cm
79 cm
XXL
66 cm
81 cm
Unisex organic sweatshirt, regular fit.
Chest width is measured flat, from armpit to armpit. Lay a top that fits you well on a table and compare. Sizes can vary by about 2 cm. All three are a unisex fit. Between two sizes? Pick the larger one.
Paper size
Frame
Printed on thick matte art paper, with a white border like a real lino print. All your layers and inks print as they look in the preview.
How many
This design is coming soon. You can look at it on every product now; orders open when the print file is ready.
Your basket
Ordering for a group? Add each size as its own line. You can mix tees and prints in one order.
Printed to order by our print partner, then sent to you. Your own designs can be returned only if faulty. Shop designs can be returned in 14 days.
Everything after the first tap: layers, inks, touch-ups, files, carving and tees.
Layers
A layer is one lino block and one ink. A 3-layer design needs 3 blocks, or one block that you cut 3 times. Print the lightest ink first and the darkest ink last. Each ink goes on top of the inks before it.
Tip New to lino? Start with 1 layer (Bold black). Add layers when you are happy with your carving.
Light and dark, or colour
The tool splits your photo into layers in one of two ways. The styles choose this for you. To change it, go to 2b Your blocks, tap More options, open Inks, then use Colours from.
Light and darkEach layer covers the darker parts of the layer before it. Good for pets, faces and strong shapes. You can cut it on one block (a reduction print).ColourEach layer is one colour area of the photo, side by side. Good for bright photos. You need one block for each colour.
Ink amount
Go to 2b Your blocks. On the light-and-dark looks, each block card has a slider from Less ink to More ink. Move it right and that layer covers more of the picture.
Less inkMiddleMore ink
Tip The layers always stay in order from light to dark. If you move one slider past the next layer, the tool moves that slider too. Reset amounts puts all sliders back.
Inks
Go to 2b Your blocks. Tap the colour box on a block card to change its ink. The first colours in the list are the PULPO! inks:
Ochre
Vermilion
Sea Green
Ultramarine
Ink Black
In Colour mode, Use photo colour puts back the colour from your photo.
Solid or see-through ink (More options, then Inks): solid ink covers the ink under it. See-through ink mixes with it, like a real transparent ink. This changes only the preview, not the plates.
Touch up by hand
Use the brush to fix small things that the tool gets wrong, for example an eye, a line of text or a spot.
In 2b Your blocks, tap More options and open Touch up. The preview shows the finished print.
Under Paint on, pick the layer that you want to change. To see only that layer (colour stays on the block, grey is cut away), tick This layer only.
Pick Add ink or Remove ink. Set the brush size: the number shows its real size on the print, from 0.16 mm.
For fine detail, zoom in with +, pinch with two fingers, or hold Ctrl and scroll. Pick Look to move around without painting.
Paint on the preview with your finger or mouse. If you do not like it, tap Undo.
Tip With This layer only ticked, the layer shows flipped, the same way that you carve it. Your touch-ups stay when you change the ink amount or the inks. Crop, rotate and a new photo remove them.
Crop, rotate and background
Get the photo right in step 1, before it becomes layers. "Remove the background" and "Light and contrast" are in step 1 too.
Tap Crop in step 1.
Pick a shape. The A-size shapes fit standard lino blocks.
Drag on the picture to draw the crop.
Tap Apply crop. To go back, tap Remove crop or Undo.
Your blocks and more options
Contrast and brightness are in step 1, under Light and contrast. Step 2 has two parts: 2a Pick a look, then 2b Your blocks.
In Your blocks, each block has a card with its ink and a Detail slider. On the photo-colour looks, the card also shows the photo colours that print on that block. Tap a colour to move it to another block, or to the paper (no ink). To keep a small colour, such as a yellow bill, tap it and choose Keep it alone on a new block. If a colour is not in the list, push Pick a colour from the photo and tap the photo. Choose a sample of 1 pixel, 3 × 3 or 5 × 5: a bigger sample takes the average, which is better on grainy photos. You can have up to 8 blocks.
Under the cards, More options has Inks, Detail, Blocks, Texture and Touch up. You do not need these settings for a good print. Use them when one thing is wrong.
Setting
What it does
Use it when
Contrast
Makes light parts lighter and dark parts darker
The photo looks flat or grey
Brightness
Makes the whole picture lighter or darker
There is too much or too little ink overall
Simplify shapes
Smooths the photo before it splits into layers
The shapes are too busy to carve
Remove specks
Removes small dots and islands of ink
You see dots smaller than your cutter
Outline the shapes
Adds cut-style lines to the last layer
The shapes need clear edges
Shading lines
Turns mid-tones into rows of cut lines
You want an engraved look (Light and dark only)
White gaps between colours
Leaves a thin paper line around each shape
You want a white-line print
Gouge marks, paper colour, ink texture
Change how the preview and the print image look
Only the look. The plates do not change.
Print size and files
In step 3, tap Carve it yourself, then pick the size of your lino block: A6, A5 or A4. The design fits inside the block with a small border. For any other size, open Other size.
Print width (in Other size) is the width of the design in mm. The height follows the shape of the photo.
Quality: Draft (150 dpi) for a quick test, Print (300 dpi) for most blocks, Fine detail (600 dpi) for small or detailed blocks.
Flip plates for carving: keep this on. A print is the mirror image of its block, so the plate must be flipped.
File
Use it for
Layer plates (PNG)
Print at 100% and transfer to the lino. Black stays raised. White is cut away. Each plate has registration marks and a 10 mm scale bar.
Cutter files (SVG)
Laser cutters and vinyl cutters. The red frame is the edge of the block.
Finished print (PNG and SVG)
A preview to share or to check the colours.
T-shirt image (PNG)
The design with no paper background.
Print notes (TXT)
The print order, the inks and the sizes.
Tip After you print a plate, measure the 10 mm bar with a ruler. If it is not 10 mm, your printer changed the scale.
From file to print
Print each plate at 100% scale. Measure the 10 mm bar.
Put carbon paper on the lino, then the plate face up on top. Trace the lines. If you use a toner transfer, turn off Flip plates first, because that method flips the picture for you.
Cut away the white areas. Leave the black areas raised.
Roll the lightest ink onto block 1. Print all your sheets.
Line up block 2 with the registration marks and print the next ink on top. Do the same for each block, light to dark.
Separate blocks
One block for each layer. Mistakes are easier to fix. You need this for Colour mode.
Reduction (one block)
Light and dark mode only. Print layer 1, then cut more away from the same block and print layer 2 on top. Print all your copies at each stage, because you cannot go back.
Tees and prints
Art prints and framed prints come in A4 or 30 × 40 cm, with a white paper border. They print the finished design with all your layers and inks. Frames come in black, oak or white.
Lightest layer: Let the white tee show leaves out layer 1, so the white tee becomes the lightest colour and the design has no box around it. Print it keeps layer 1, for a print with a solid background.
Print size: big on the front, or small on the chest.
Print quality checks the size of your photo. If it says low, use a larger photo.
Ordering for a group? Add each size to the basket as its own line.
Everything for your design, in one zip. £4, one payment, download at once.
Layered SVG for Cricut and vinylOne layer per colour, in your ink colours. Import it into Cricut Design Space or Silhouette.
Cutter files for laser and CNCOne SVG per block, flipped for carving, with the block edge.
A3 print filesThe finished print and the plates at A3, 300 dpi.
Print guideBlock order, inks, how much each block covers, and how to line up the colours. Opens in any browser; print it.
Ink recipesHow to mix each ink from basic block printing colours.
Registration jigPrint it at 100%: it shows where the block and the paper go, so every colour lands in the same place.
The free files stay free: the PNG plates and the finished print. You can use the pack for things you sell.
The payment page is run by Link (Stripe), which sells the pack for us and adds any local sales tax. Your receipt comes from Link. See the terms of sale.
To download it again later, use the link in your email, or this page's address.
Download your files
1 Email
2 Prepare
3 Files
Advertisement
Fresh off the block. Your files are ready.
A plate for each layer (PNG), the finished print, a T-shirt-ready image and print notes. SVG cutter files are in the . By downloading, you accept the terms of use and the content and rights policy.
You are on the list. Look in your email for your free delivery code.
Save one file only
Want it all in one box?We are working on our own kits: blocks, inks, roller and paper for your design, in one box.